 Image 1 of 1
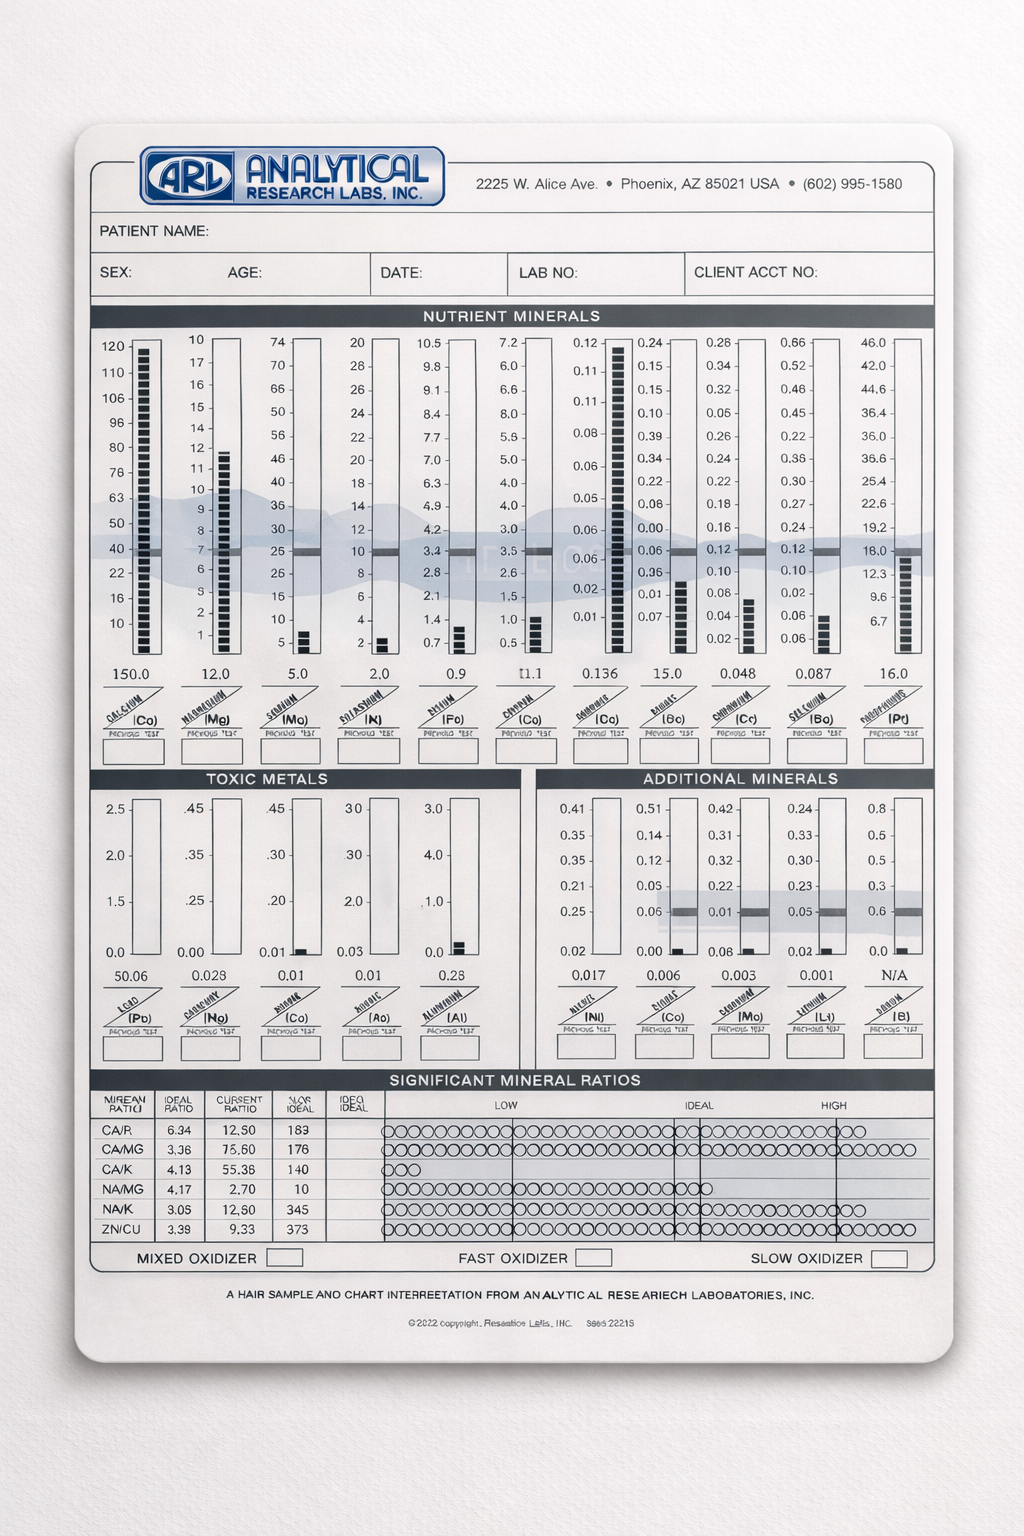
This profile includes a basic multi-element lab test showing levels of essential minerals, trace minerals, toxic metals, and key ratios. Results are shown in a chart with the client’s information and a visual display of findings. No interpretation is included.
After placing your order, you will receive a packet which will include everything you need to collect and send your hair to Analytical Research Labs for testing.
Clients seeking further support in understanding their results can combine this service with an HTMA consultation, which includes a one-hour consultation with HTMA Practitioner, Rebecca Badge.
Macrominerals
Calcium (Ca)
Magnesium (Mg)
Sodium (Na)
Potassium (K)
Phosphorus (P)
Trace / Essential Minerals
Iron (Fe)
Copper (Cu)
Zinc (Zn)
Manganese (Mn)
Chromium (Cr)
Selenium (Se)
Cobalt (Co)
Molybdenum (Mo)
Sulfur (S)
Aluminum (Al)
Arsenic (As)
Cadmium (Cd)
Lead (Pb)
Mercury (Hg)
Nickel (Ni)
Key mineral ratios (like Ca/P, Na/K, Zn/Cu, etc.)
A graphical chart showing results vs. ideal ranges
No interpretation unless ordered separately